I’ve been seeing these cute bottle cap necklaces around and thought they didn’t look too hard to make. Through some trial and error, I finally figured it out. I made my kids their own “Favorite Child” necklace. I made Coco’s teacher a “Favorite Teacher” necklace. I made the little girl’s basketball team I coach their own necklaces….The possibilities are endless. It is a very cute, fast crafty thing to do.
- 1″ bottle caps (I found fun colored ones online)
- 1″ circle punch (find online or at your local scrapbooking store)
- round 1.80 mm europunch (to punch to holes in the metal – find online or at your local scrapbooking store)
- #3 aluminum ball chain (I found online)
- #3 aluminum ball chain connectors (I ordered with the ball chain)
- 6 mm jump rings ( these connect the bottle cap to the chain -I got them in the jewelry findings section at Michaels)
- epoxy resin (I used envirotex lite pour-on high gloss found behind the counter at my local hardware store)


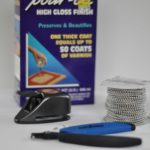
- My supplies
You also need an image. In Coco’s necklace above I just printed words in different fonts on fancy paper and punched them out with the 1″ circle punch. So you can make your own images, or there is a whole slew of super cute digital 1″ bottle cap images available for purchase on etsy at super good prices. Just search for “digital bottle cap images”.
-
Punch out however many images you need and glue (don’t use rubber cement) them in the bottle cap. Let dry.
-
Mix the epoxy per the manufacturer’s instructions in a well ventilated spot. You don’t need much. I usually do it in a disposable plastic cup & use coffee stir sticks to mix.
-
Pour the epoxy over the image to cover. You don’t need much and you need to leave room to punch a hole in the bottle cap. Let dry 24 hours.
-
With the euro punch, punch a hole where you want the jump ring attached and attach the jump ring.
-
Cut the ball chain to the length you need and attach the connector.
-
String the chain through the jump ring.
-
Voila! You now have a super cute bottle cap necklace (or key chain or magnet – the possibilities are endless!)
